

How to Start Selling on eBay – 7 Day Plan to Your First Sale
eBay is one of the fastest ways to start earning money on the side. Almost everyone has stuff just lying around their house that they could sell. The question is, how do you get started selling on eBay as a beginner?
To start selling on eBay, set up a seller’s account, find products around your house that you can sell, take pictures with your phone, craft a compelling listing, price your item competitively, and answer any customer service questions. Once the item is sold, print the shipping label, package it up, and ship it to your customer. Finally, don’t forget to ask for a review once they recieved the product.
I know this may sound a bit overwhelming, but this isn’t theory – it’s a proven roadmap that works for anyone willing to follow it. By the end, you’ll have everything you need to make your first sale within 7 days.
Let’s dive in.
Step 1: Set Up Your eBay Seller Account (Day 1)
Create Your Account
First things first – you need an eBay seller’s account. This isn’t just signing up; it’s building the foundation for your online business.
What you’ll need:
- Valid email address
- US bank account or credit card
- Phone number for verification
- Social Security Number (for tax purposes)
- Government-issued ID (sometimes required)
The eBay Sign-Up Process
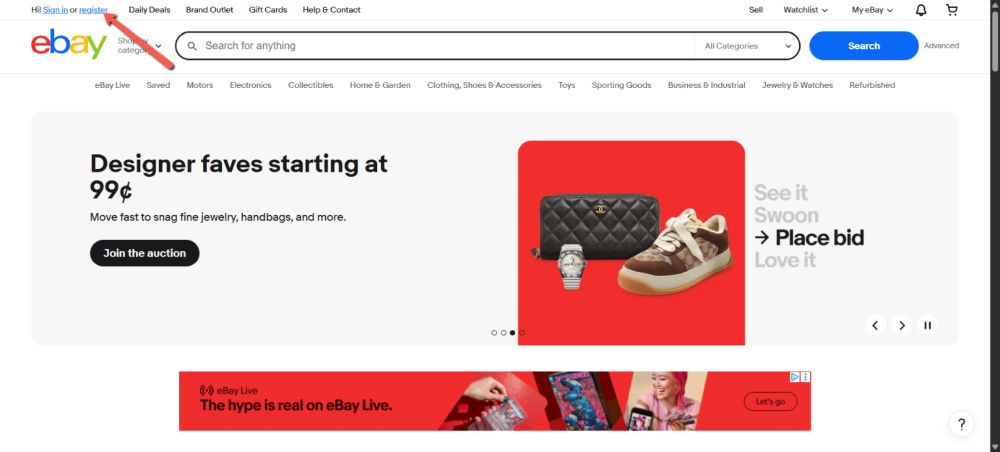
Step 1: Go to eBay.com and click “Register”
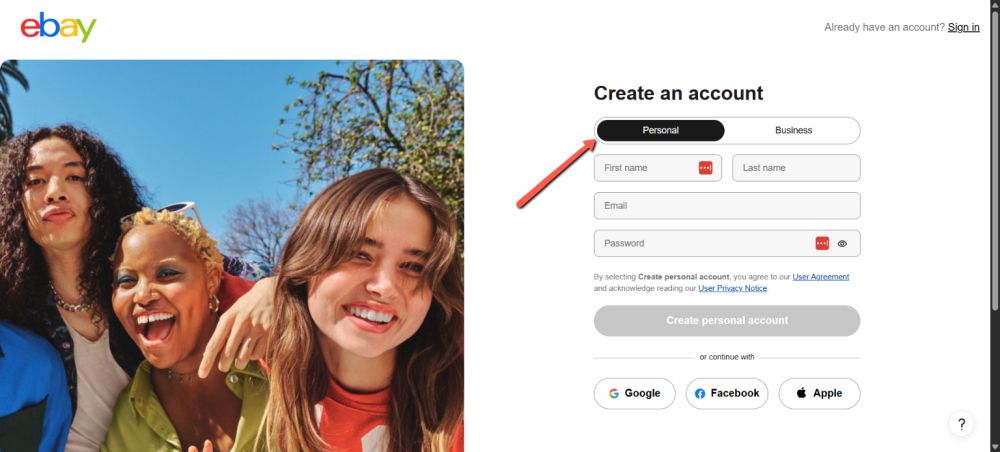
Step 2: Choose a Personal or Business account. With a personal account, you receive up to 250 free listings per month, which is more than enough for a beginner. With a business account, you can get up to 1000 free listings per month.
Quick Tip: You can always start with a personal account and upgrade to a business account when you need it.
From here, you can fill out your personal information, email, and create a password.
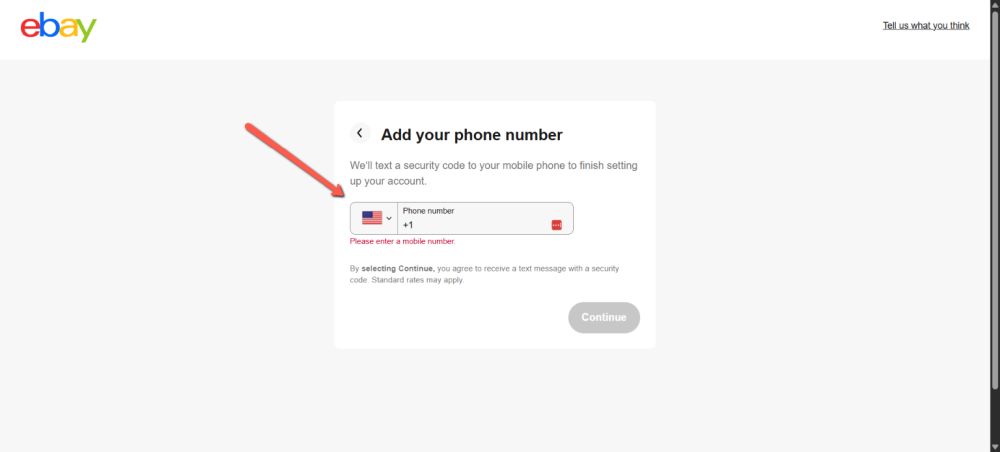
Step 3: Verify your phone number via text.
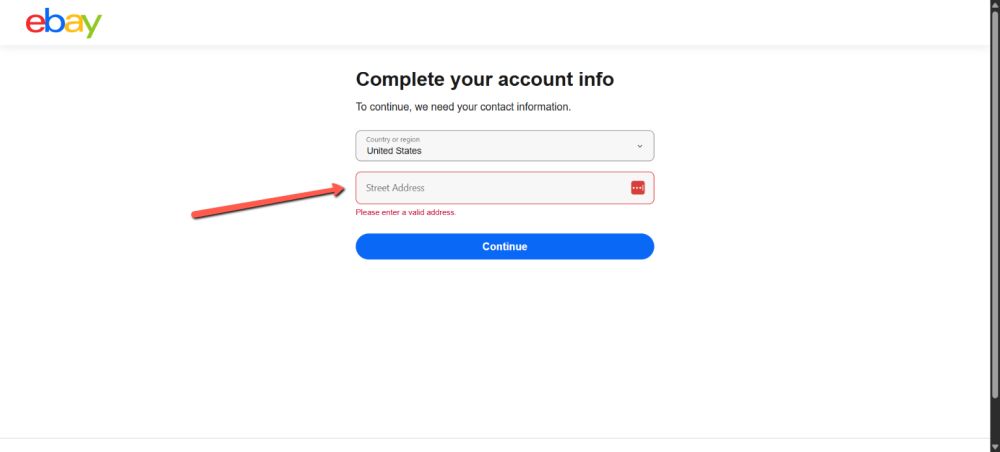
Congrats, your eBay account is live, but you’re not quite done yet. Click on My eBay in the top right corner.
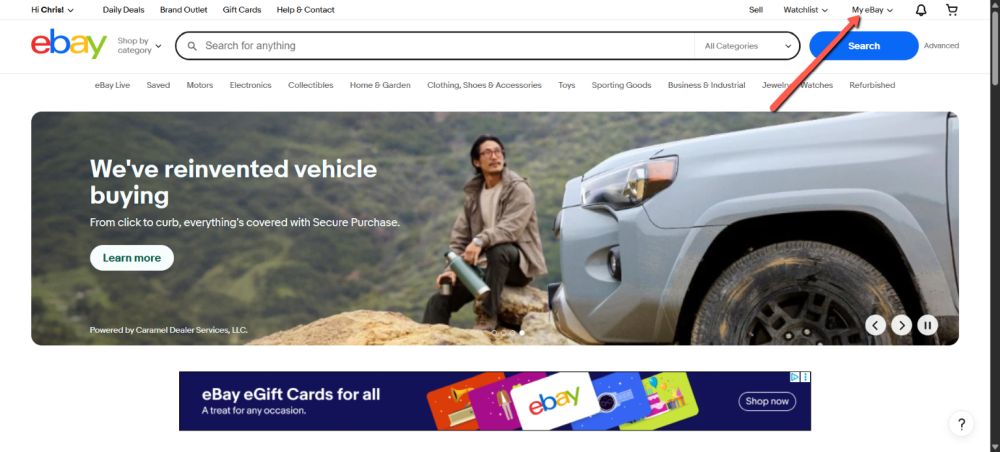
Click on My eBay and fill out the remaining details
Critical tip: Choose your username carefully. “TreasureHunter2025” sounds more professional than “RandomStuff4U.” This becomes your brand identity.
Complete Identity Verification
eBay requires identity verification for new US sellers. Don’t panic – this is normal and protects both you and buyers.
The verification includes:
- Photo ID upload
- Bank account confirmation
- Address verification
This process typically takes 24-48 hours. Use this waiting period productively – start researching what to sell.
Step 2: Research Your First Products to Sell (Day 2)
Identify High-Demand, Beginner-Friendly Items
Not all products are created equal on eBay. You want items that sell quickly, ship easily, and don’t require expertise to evaluate. I also recommend picking something you know something about.
For example, I started with items like guitar equipment because I knew a lot about that stuff. I also recommend starting with small, inexpensive items. This way, if things don’t work out, you won’t lose a lot of money and have to ship big and bulky things.
Below are some items that sell well on eBay.
| Product Type | Why It Works | Profit Potential |
|---|---|---|
| Clothing (Hoodies, Leggings) | Always in demand, lightweight shipping | $10-50 per item |
| Accessories (Baseball Caps, Beanies) | Small, easy to store and ship | $8-30 per item |
| Fitness Gear (Yoga Mats, Water Bottles) | Growing market, repeat buyers | $15-40 per item |
| Tools & Gadgets (Multi-tools, Magnifiers) | Problem-solvers, higher margins | $20-60 per item |
Research Current Market Demand
Before selling anything, you need to understand what people are actually buying. Here’s my proven research method:
Search completed listings: Look for items like yours that actually sold. You can do this by doing a search for a product and then scrolling all the way down and clicking on Sold Items.
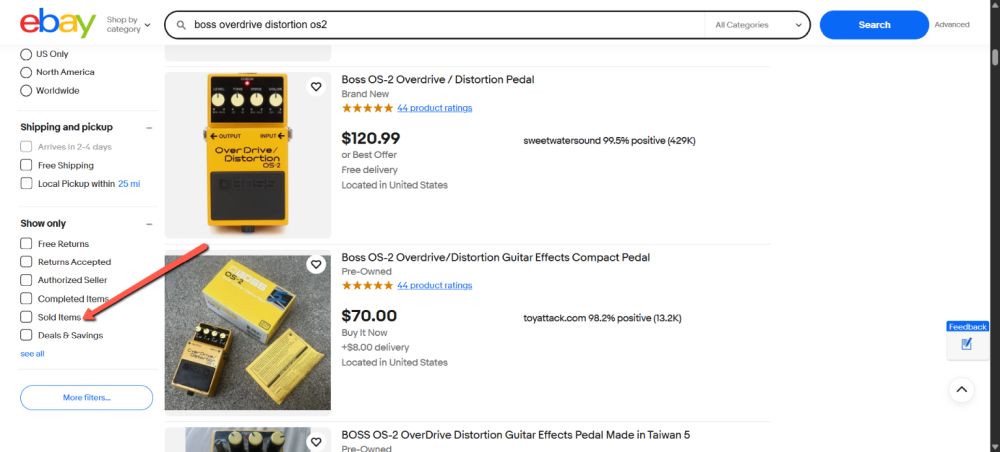
Check active listings: This will show you how many of this item are currently listed. In the case of this guitar foot pedal, it had 51 sold and 243 listed. This means people are generally buying the item. If you see no sales, then this may mean nobody is buying this item.
Note price ranges: You can also review the prices and see how much this item sold for by looking at the lowest and highest prices.
Study successful listings: What makes them stand out? You can also review these listings and see what made them successful.
Step 3: Source Your First Inventory (Day 3)
Start With Items You Already Own
The fastest way to begin is to sell items from your own home. This eliminates upfront costs and teaches you the basics without financial risk. Here are just a few items I came across in my house.
Organize your items in one specific place so you can always find them. For example, I have my stuff on a shelf in my basement. As you buy more and sell more, you’ll want to have a more organized way of keeping track of things.
Many eBay sellers do this by using plastic tubes and an alphanumeric system to keep track of things. So if you have the item in tube A1, you can input this into the SKU section for your reference of the listing to know where it’s at.
Look for these items around your house:
- Electronics you’ve upgraded from
- Designer clothes you no longer wear
- Books, especially textbooks or specialized guides
- Collectibles gathering dust
- Tools or equipment you rarely use
- Exercise equipment is taking up space
Quality check: Only sell items you’d be comfortable buying yourself. Condition matters more than you think.
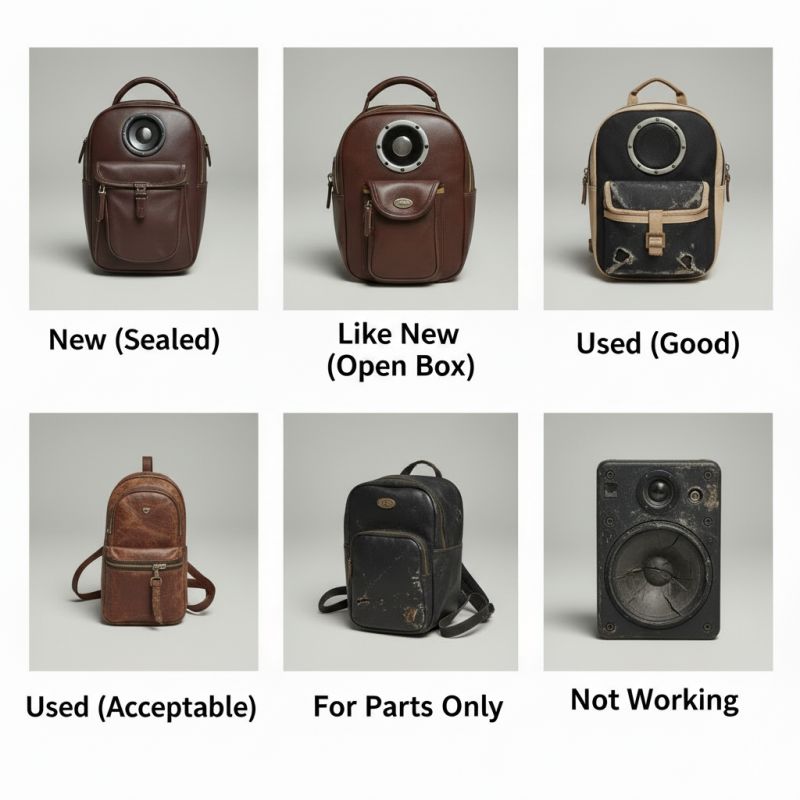
Evaluate Item Condition Honestly
eBay buyers expect accurate descriptions. Here’s how to grade your items:
- New: Never used, still in packaging
- Like New: Used once or twice, no visible wear
- Excellent: Light use, minimal signs of wear
- Very Good: Moderate use, some wear, but fully functional
- Good: Well-used but works perfectly
- Acceptable: Heavy wear but still functional
Consider Low-Cost Sourcing Options
Once you’ve sold personal items, consider these beginner-friendly sourcing methods:
- Garage sales: Get there early for the best selection
- Estate sales: Higher-quality items, better profit margins
- Thrift stores: Consistent inventory, brand-name finds
- Clearance sections: Retail stores clearing seasonal items
- Facebook Marketplace: Buy low locally, sell nationally on eBay
Step 4: Master the Art of eBay Listing (Day 4-5)
Below is a quick video I created that will walk you through the process of listing your item on eBay.
When you’re getting started, you can create your listing from scratch, or you can create a listing by copying a successful existing listing. Here is the basic process of how this works.
To do this, search for your exact product that matches yours. Below the listing, you can click a link that says, Have One to Sell? SELL NOW. From here, you can edit the listing to match your item.
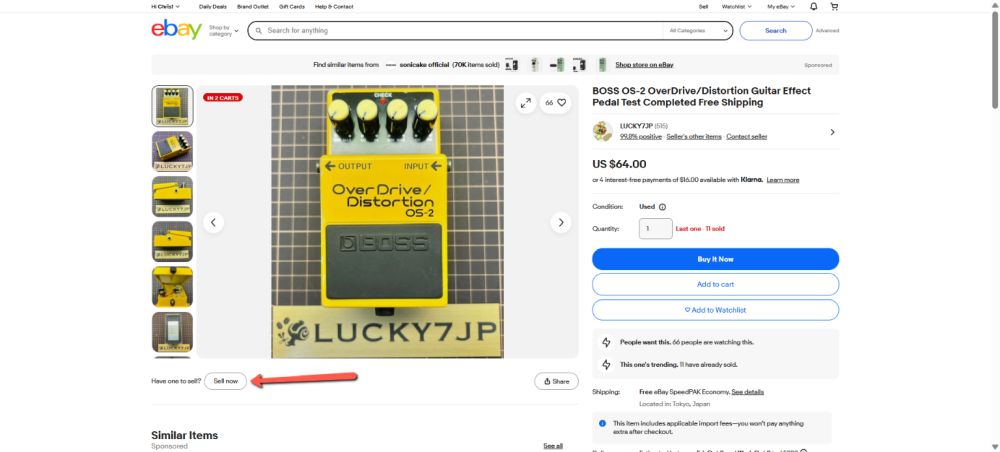
This will save you time, but you will still want to use your own photos and adjust words to fit the specific condition of your item.
You can also use the tips below to help you craft your listing and make it stand out.
Craft Compelling Titles That Sell
Your title is your first impression – make it count. You have 80 characters to grab attention and include searchable keywords.
Bad title: “Nice jacket for sale”
Good title: “North Face Men’s Summit Series Gore-Tex Jacket Size Large Black”
Pro Tip: You get 80 characters in your title. Use as much of it as you can to describe the item you’re listing.
Title formula that works: Brand + Product Type + Key Features + Size/Model + Color + Condition
Include these keywords when relevant:
- Brand name
- Size or model
- Color
- Material
- Condition
- Style or collection name
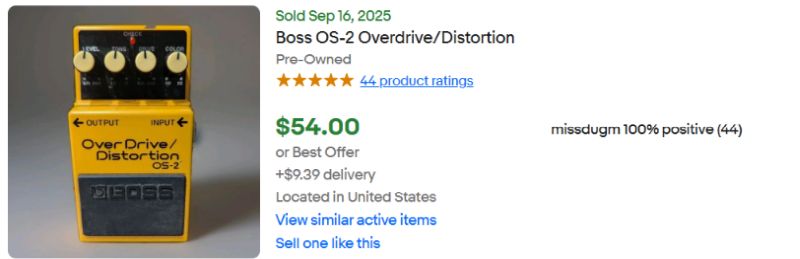
Here is an example of a bad title listing. This one just says the name of the product and only uses 30 characters of the 80 available. It’s OK, but it doesn’t really go into much detail beyond that.
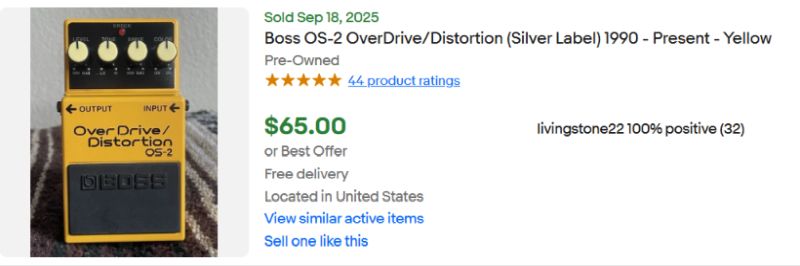
Here is an example of a good title listing. This listing goes into more detail and uses 69 of the 80 characters. It could still be improved, but it’s way better than the first option.
Write Descriptions That Convert Browsers to Buyers
When it comes to the description, keep it short and to the point. Cover all the features, and any issues with the item, condition, and any other special option, such as free shipping.
Take pictures from all sides and show any features or issues with the item.
Take Photos That Showcase Your Items
Photos make or break eBay listings. Poor photos kill sales faster than high prices.
Photo checklist:
- Use natural lighting (near a window works great)
- Clean backgrounds (white sheet or poster board)
- Multiple angles (front, back, sides, close-ups)
- Show any flaws honestly
- Include size reference (coins, rulers, hands)
- Take 24 photos maximum (eBay’s limit)
Phone photography tips:
- Clean your camera lens first
- Use square mode or a 1:1 setting
- Avoid digital zoom – get closer instead
- Take extras and choose the best
- If you don’t get the perfect close-up, you can always crop the photo on the eBay photo editor
Step 5: Price Strategically for Quick Sales (Day 5)
Research Competitive Pricing
Pricing determines whether you sell quickly or watch items sit unsold for months.
My proven pricing research method:
- Search for identical items using “Sold Listings”
- Note the price range for similar condition items
- Check current active listings for competition
- Price 10-15% below average sold prices for quick sales
- Factor in eBay fees (roughly 12-15% total)
Pricing strategies for beginners:
Buy It Now: Set a fixed price for immediate sales
- Best for items with established market value
- Faster sales, predictable income
- Price competitively for visibility
Auction Style: Let buyers bid up the price
- Good for unique or rare items
- Can achieve higher prices
- Start at $0.99 to attract watchers
Best Offer: Allow negotiations on fixed-price listings
- Creates engagement and urgency
- Helps gauge market demand
- Accept offers 15-20% below the asking price
Calculate Your True Profit
Many beginners forget about fees and expenses. Here’s the real math:
eBay fees: ~13.6% of total sale (item + shipping). This varies based on the item and category you are selling in.
PayPal fees: ~2.9% + $0.30 per transaction. This is the cost of doing business when people buy with credit cards or PayPal.
Shipping materials: $1-5 per item. You can reuse old boxes to ship stuff to save a few bucks.
Time investment: Value your hours. I like to have 20% to 30% profit at a minimum; higher is always better.
Example calculation:
- Sell item for $50 + $10 shipping
- eBay fees: $8.16
- Shipping Label: $8
- PayPal fees: $2.09
- Shipping materials: $3
- Net profit: $38.75(if the item costs you nothing)
If the item cost you nothing, you would have a 64% profit margin. However, if the item cost you $15, you would earn $23.75 or roughly 40%, not bad.
Step 6: Set Up Shipping Like a Pro (Day 6)
Choose Your Shipping Strategy
Shipping strategy affects everything: search ranking, buyer satisfaction, and your profit margins. eBay prioritizes sellers who offer fast, affordable shipping.
Two approaches that work:
Free Shipping (Recommended):
- Build shipping cost into item price
- Better search visibility
- Meets buyer expectations
- Higher conversion rates
Calculated Shipping:
- Buyer pays the actual shipping cost
- Better for heavy/large items
- More transparent pricing
- Can reduce final value fees slightly
Master eBay’s Shipping Tools
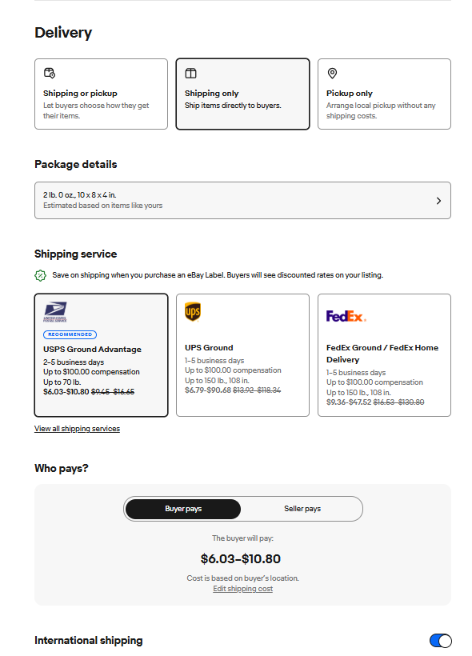
When you’re listing your item, decide on how you want to ship it. In most cases, I use shipping only. Then list the package details. Then choose your shipping service. In most cases, I use the United States Postal Service, since they tend to have the best rates.
Finally, you need to decide who pays the shipping. If most people are charging shipping, then go with that option and have the buyer pay it. If everyone is using free shipping, then go this route.
Recommend Tools: One tool I recommend buying is a thermal printer. This is a tool specificly designed for printing shipping labels. If you don’t have the money for this you can print the QR Code from eBay and print it at the post office for free.
Package Items for Success
Professional packaging protects your items and impresses buyers.
Packaging essentials:
- Bubble mailers for small items
- Boxes for fragile items
- Bubble wrap for protection
- Tissue paper for a premium feel
- “Thank You” stickers or notes
Packaging by category:
- Clothes: Poly mailers with tissue paper
- Electronics: Original boxes when possible, anti-static bags
- Fragile items: Double-box with plenty of padding
- Books: Bubble mailers with cardboard backing
Step 7: Launch Your First Listings (Day 7)
Create Your First 5 Listings
Start with 5 items to test the waters. This gives you experience without overwhelming yourself.
First listing checklist:
- [ ] Eye-catching, keyword-rich title
- [ ] Detailed, honest description
- [ ] 8-24 high-quality photos
- [ ] Competitive pricing
- [ ] Professional shipping options
- [ ] Return policy clearly stated
Listing Type: In most cases, just use the Buy It Now option. The auction option only works best for high-demand items that could bring more money.
Optimize for eBay’s Search Algorithm
eBay’s “Best Match” algorithm determines who sees your listings. Optimize for visibility:
Factors that boost rankings:
- Complete item specifics (fill out every field)
- Fast shipping options
- Competitive pricing
- Good seller metrics
- Recent listing activity
Item specifics are crucial: eBay provides dropdown menus for most categories. Fill out every relevant field – size, color, brand, material, etc.
Step 8: Provide Exceptional Customer Service
Respond to Messages Quickly
Fast communication sets you apart from lazy sellers. Respond within 2-4 hours during business hours.
Common buyer questions and responses:
“Can you provide more photos?” “Absolutely! I’ll take additional photos and send them within an hour.”
“Will you accept $X for this item?” “Thanks for your interest! I can accept $Y [counter-offer]. Would that work for you?”
“When will this ship?” “I ship within 1 business day of payment. With Priority Mail, you’ll receive it by [specific date].”
Handle Issues Professionally
Problems happen. How you handle them determines your reputation.
The service recovery formula:
- Acknowledge quickly: “I understand your concern…”
- Take responsibility: “Let me make this right…”
- Offer solutions: “Here’s what I can do…”
- Follow up: “Is everything resolved to your satisfaction?”
Common issues and solutions:
- Item arrived damaged: Offer full refund or replacement
- Item not as described: Accept return, improve future descriptions
- Shipping delays: Communicate proactively, offer partial refunds
- Buyer’s remorse: Be understanding, accept returns gracefully
Step 9: Build Your Seller Reputation Fast
Get Your First Positive Feedback
Feedback is everything on eBay. New sellers face skepticism, so build positive feedback quickly.
Strategies for fast feedback:
- Buy a few items first: Establish account history
- Sell low-cost items initially: Reduce buyer risk
- Over-deliver on service: Exceed expectations
- Ask for feedback politely: Include note with shipments
- Leave feedback first: Encourage reciprocal feedback
Feedback request template: “Thank you for your purchase! I hope you love your new [item]. If you’re satisfied, I’d greatly appreciate positive feedback. If there are any issues, please message me first – I’m here to help!”
Monitor Your Seller Metrics
eBay tracks several performance metrics that affect your visibility:
Key metrics to watch:
- Feedback score: Aim for 100% positive (99%+ minimum)
- Defect rate: Keep below 2%
- Late shipment rate: Ship on time, every time
- Message response time: Under 12 hours average
- Return rate: Under 5% for most categories

Step 10: Scale Your eBay Business
Analyze What’s Working
After your first 10-20 sales, analyze your performance:
Questions to ask:
- Which items sold fastest?
- What price points worked best?
- Which photos got the most views?
- What feedback did buyers leave?
- Where did you spend the most time?
Use eBay’s seller hub: Track your performance metrics and identify improvement opportunities.
Expand Your Inventory Strategically
Reinvest profits into inventory: Start with proven categories, then expand gradually.
Scaling strategies:
- Double down on winners: Buy more of what’s selling
- Test adjacent categories: Similar items, different brands
- Increase quantity: Buy in small wholesale lots
- Improve efficiency: Better photos, templates, storage systems
Inventory management tools:
- Simple spreadsheet for tracking costs/profits
- eBay’s mobile app for quick listings
- Photo storage system for product images
- Dedicated workspace for photography/shipping
Advanced Tips for Serious Sellers
Level up your game:
- Create listing templates: Save time on similar items
- Use scheduled listings: Maintain consistent inventory
- Offer promotional discounts: Attract more buyers
- Cross-promote related items: Increase average order value
- Consider eBay stores: Professional appearance, lower fees
Avoiding Common Beginner Mistakes
The Top 5 Mistakes That Kill New Sellers
Mistake #1: Poor photo quality Solution: Natural lighting, clean backgrounds, multiple angles
Mistake #2: Unrealistic pricing Solution: Research sold listings, price competitively
Mistake #3: Slow communication Solution: Check messages 2-3 times daily, respond quickly
Mistake #4: Inaccurate descriptions Solution: Be brutally honest about the condition and flaws
Mistake #5: Inadequate packaging Solution: Invest in proper shipping materials, package like a pro
Legal and Tax Considerations for US Sellers
Important note: eBay reports seller income to the IRS. Keep detailed records of:
- Purchase costs and dates
- Selling prices and fees
- Shipping and packaging expenses
- Business-related travel (sourcing trips)
Consult a tax professional if you earn more than $600 annually from eBay sales.
Your 30-Day Action Plan
Week 1: Foundation
- Day 1: Create and verify eBay account
- Day 2-3: Research products and source first inventory
- Day 4-5: Create your first 5 listings
- Day 6-7: Optimize shipping and customer service processes
Week 2: First Sales
- Monitor listings and respond to inquiries quickly
- Ship sold items within 1-2 business day
- Follow up with buyers for feedback
- List 5-10 additional items
Week 3: Optimization
- Analyze which items sell fastest
- Adjust pricing on slow-moving inventory
- Improve photos and descriptions based on results
- Research new product categories
Week 4: Scaling
- Reinvest profits into new inventory
- Create listing templates for efficiency
- Set up organized workspace
- Plan month 2 expansion strategy
The Bottom Line: Your eBay Success Blueprint
Selling on eBay isn’t rocket science, but it does require following a proven system. The sellers making serious money didn’t succeed by accident – they followed steps like these and stayed consistent.
Your competitive advantage: While others hesitate, you’re taking action. While they make excuses, you’re making sales. While they overthink, you’re learning through doing.
The opportunity is massive. eBay facilitates over $75 billion in transactions annually, and there’s room for sellers who provide value and excellent service.
Success factors that matter most:
- Quality listings with honest descriptions and great photos
- Competitive pricing based on market research
- Fast, professional communication
- Reliable shipping and customer service
- Continuous learning and improvement
Start today. List one item. Learn from the experience. Then list another.
Your eBay business begins with that first listing. What are you waiting for?
Ready to launch your eBay business? The hardest part is starting. Pick one item, follow this guide step-by-step, and make your first sale within 7 days. Your future self will thank you for taking action today.
What’s the first item you’re going to list? Share in the comments – I’d love to help you price it for success!