

How to Create and Sell Online Courses – A Complete Guide
I’m going to level with you: creating an online course isn’t just about recording yourself talking into a camera and hoping people throw money at you. But here’s the thing—it’s also not nearly as complicated as those “guru” types make it seem.
To create and sell an online course, you need to pick a proven profitable course topic, choose a platform, plan and record your content, price it according to the value it provides, build your sales funnel that converts searchers to students, and finally market and promote it in the places your audience already exists.
Whether you’re a yoga instructor tired of trading hours for dollars, a marketing whiz with strategies to share, or someone who’s just really, really good at making sourdough bread (yes, that’s a thing), there’s an audience out there hungry for what you know.
So grab your coffee, settle in, and let’s walk through exactly how to create an online course that actually sells.
Why Online Courses Are Still Worth Your Time
Before we dive into the how, let’s discuss the why for a moment. The online course market isn’t slowing down—it’s accelerating. People want to learn on their own schedule, at their own pace, and from the comfort of their own couch (or bed – no judgment here).
You’ve got knowledge that someone needs. Maybe it’s a skill you’ve spent years mastering, or a problem you’ve solved that others are still wrestling with.
That’s gold. And unlike traditional teaching gigs, online course creation lets you teach once and earn repeatedly. It’s the closest thing to passive income that actually requires real work upfront.

Step 1: Choosing Your Profitable Course Topic
Here’s where most people freeze up. What should I teach? Will anyone actually care? Let me save you some anxiety: your course topic doesn’t need to be revolutionary. It needs to be useful.
Start With What You Know
I always tell people to begin with the intersection of three things:
- What you’re genuinely good at
- What people actively want to learn
- What you can teach better than a quick YouTube video
Think about the questions people constantly ask you. What do friends hit you up for advice about? What skills have you developed in your career that others struggle with? That’s your starting point.
Validate Before You Create
This is crucial, and it’s where so many would-be course creators mess up. They spend months building a course nobody wants. Don’t be that person.
Here’s how to validate your online course idea:
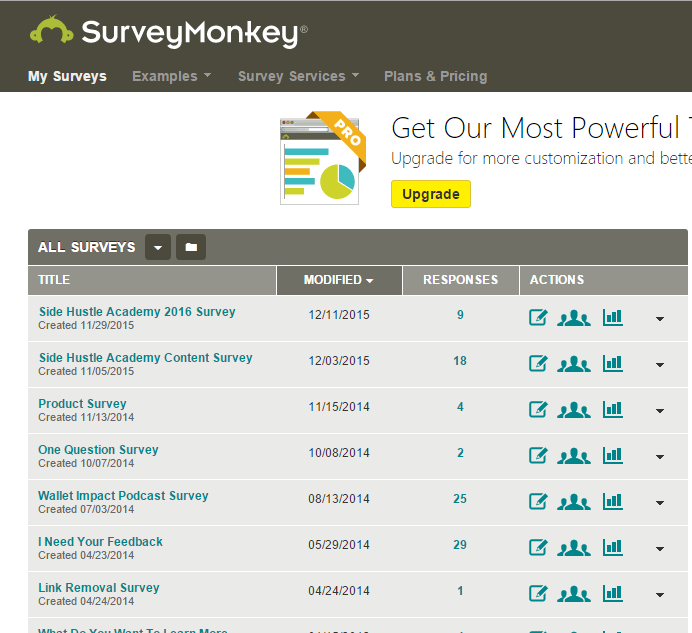
Survey your audience. If you have any kind of following—email list, social media, whatever—ask them what they’re struggling with. Create a simple poll or send out a quick survey. The feedback will surprise you. Here’s some surveys I’ve done in the past.
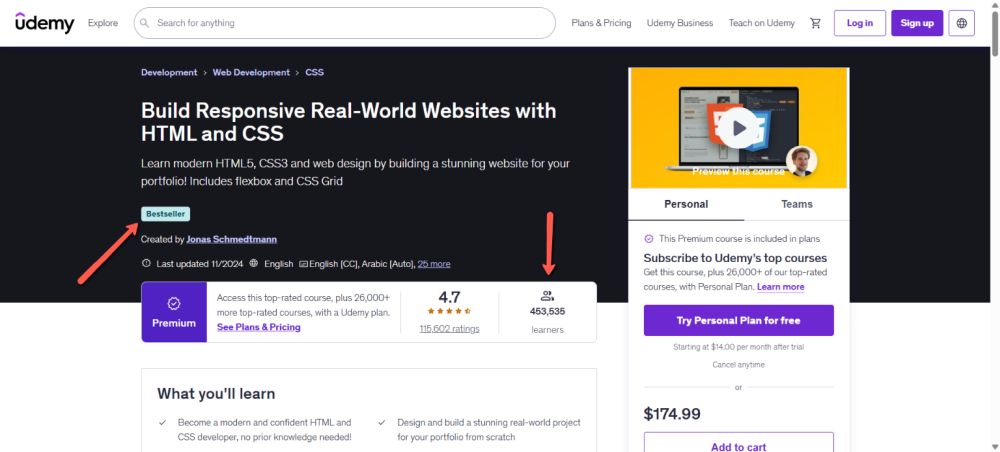
Check the competition. Head over to Udemy, Skillshare, or search for your topic on Google. See what courses already exist. Now, before you panic that everything’s been done—good! Competition means there’s demand. Your job is to find the angle others are missing.
You’ll want to look for courses that are listed as BestSellers, have good ratings, and have a lot of students. This course on building responsive HTML and CSS is a good example of that. This is clearly a topic that is in demand.
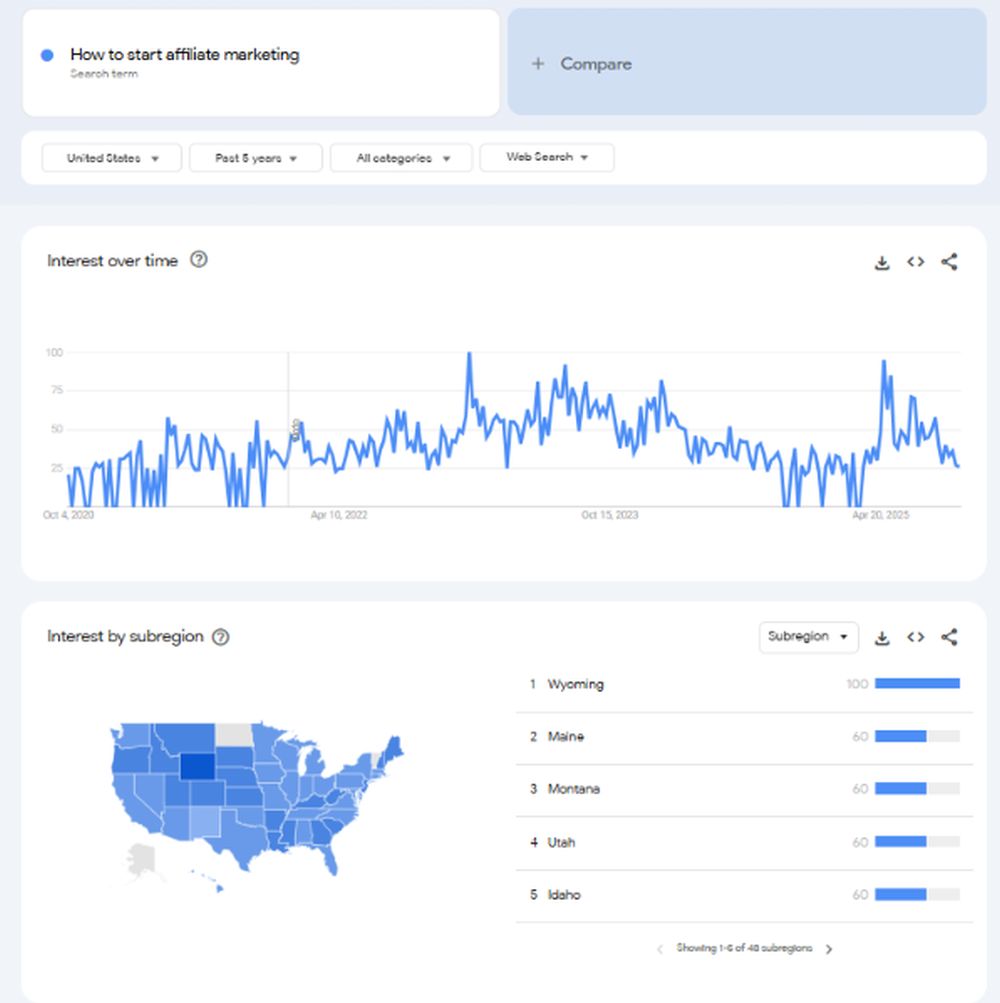
Run keyword research. Tools like Google Trends, Answer the Public, or even just typing your topic into Google and seeing what auto-completes can reveal what people are actually searching for. Look for those step-by-step queries, the “how to” questions that light up the search results.
To do this, set your time period to the Past 5 Years. As you can see with the topic I typed in on How to Start Affiliate Marketing, it shows there is decent demand for it.
Pre-sell it. This is my favorite validation method because it’s foolproof. Create a landing page describing your course, set a launch date, and see if people actually put money down. If nobody bites, you’ve saved yourself months of work on the wrong topic.
Here is an article and video I did a while back on how to do a presale launch.
Step 2: Planning Your Course Content Like a Pro
Alright, you’ve validated your idea. Now it’s time to actually plan this thing. And no, “I’ll just wing it” is not a strategy—trust me on this.
Map Out Your Course Structure
Think of your course as a journey. Where is your student starting, and where do you want them to end up? What transformation are you promising?
Break it down like this:
- Modules: Your big topic areas (usually 5-8 works well)
- Lessons: Individual topics within each module (3-7 per module typically)
- Action items: What students DO with what they learn
I like to use the backward design method. Start with your end goal—what should students be able to do after completing your course?—then work backward to figure out what they need to learn to get there.
Choose Your Course Format
Video is king, but it’s not the only player in the game. Your format depends on your topic and teaching style:
Video courses work great for visual demonstrations, software tutorials, or anything where seeing helps understanding. They’re also the most popular format students expect.
Audio courses are perfect for commuters and multitaskers. Think mindset, work, storytelling, or conceptual topics.
Text-based with worksheets can work for writing courses, business planning, or anything requiring deep reflection.
Interactive courses with quizzes, assignments, and community features boost engagement like crazy. LearnWorlds and Thinkific excel at this.
Most successful online courses mix formats—video lessons with downloadable PDFs, quizzes to test understanding, and assignments for hands-on practice.
Create a Detailed Outline
For each lesson, map out:
- Learning objective (what will they understand or be able to do?)
- Key talking points
- Examples or case studies you’ll use
- Any resources or downloads needed
This outline becomes your production roadmap. It keeps you focused and ensures you don’t ramble (which, let’s be honest, is easy to do when you’re passionate about your topic).
Pro Tip: If creating a course outline seems a bit overwhelming, use ChatGPT to help you out. Just use this prompt: I’m creating a course on BLANK. Create a detailed course outline for this course that covers the entire course journey.
Step 3: Gathering Your Equipment and Software
Here’s some good news: you don’t need a Hollywood studio to create high-quality course content. But you do need to look and sound professional.
Essential Tech Setup
Camera: Your smartphone is probably good enough, honestly. Modern iPhones and Android devices shoot better video than cameras from five years ago. If you want to upgrade, a decent webcam like the Logitech C920 runs around $70-100 and gets the job done.
Microphone: This is where you should invest if you’re choosing one thing. Bad audio kills courses faster than anything else. An Audio-Technica ATR2500x-USB Cardioid Condenser Microphone is a great option for beginners.
Lighting: Natural light by a window is free and gorgeous. If you need artificial lighting, a ring light with a tripod stand ($30-100) or a simple LED panel setup will do wonders. Your goal is to eliminate harsh shadows and make the subject clearly visible.
Editing software: Don’t overthink this. Camtasia and ScreenPal are user-friendly options for beginners. If you’re on a budget, DaVinci Resolve is free and surprisingly powerful. For screen recording (great for software tutorials), Loom or OBS Studio work perfectly.
The Best Online Course Software and Platforms
Now, where are you actually going to host this masterpiece? You’ve got options, and choosing the right online course platform makes a massive difference.
| Platform | Best For | Starting Price | Key Features |
|---|---|---|---|
| Thinkific | Beginners to advanced creators | Free plan available | Drag-and-drop builder, unlimited courses, built-in marketing tools, community features |
| Kajabi | All-in-one business solution | $89/month | Courses, marketing funnels, email automation, website builder—everything in one place |
| Teachable | User-friendly course creation | Free plan available | Intuitive interface, coaching tools, flexible pricing, native payment processing |
| LearnWorlds | Interactive, engaging content | $29/month | Quick access to a large audience |
| Podia | Simplicity and affordability | $39/month | Courses, webinars, digital downloads—clean interface, no transaction fees |
| Udemy | Massive built-in marketplace, minimal setup, and less branding control | Free (but takes 50% commission) | Massive built-in marketplace, minimal setup, less branding control |
My take? If you’re just starting and want to test the waters, Thinkific or Podia’s free plans are solid. If you’re serious about building a business and want everything under one roof, Kajabi is worth the investment despite the price tag. If student engagement is your priority, LearnWorlds brings the interactive features that keep people coming back.
Step 4: Creating Your Course Content
This is it—the main event. You’ve planned it out, you’ve got your equipment ready. Now it’s time to actually create your online course.
Recording Tips That Actually Matter
Script or outline? I’m firmly in the outline camp. A full script makes you sound robotic. But winging it completely leads to rambling. Write bullet points of what you want to cover, then talk naturally through them.
Batch your recording sessions. Set aside specific days to knock out multiple lessons. You’ll maintain consistent energy and appearance (nothing worse than switching sweaters halfway through a module because you recorded over three months).
Embrace imperfection. You will mess up. You’ll stumble over words, lose your train of thought, or say “um” seventeen times in one sentence. That’s fine. Minor flubs make you relatable. Just edit out the major disasters and keep moving.
Keep lessons digestible. Aim for 5 to15 minute lessons max. Attention spans are short, and shorter lessons feel less overwhelming. Students are more likely to finish a course with 20 short lessons than five 45-minute marathons.
Creating Supplemental Materials
Video alone isn’t enough. You need resources that reinforce learning and give people something tangible to use:
- Workbooks and templates: These are gold for digital product value. If you’re teaching Instagram marketing, include caption templates. If it’s business planning, provide a financial spreadsheet template.
- Checklists: People love checking boxes. It gives them a sense of progress and ensures they don’t miss steps.
- Resource lists: Curate tools, websites, books, or articles that support your teaching. This positions you as an authority who’s done the research.
- Transcripts: Some people learn better by reading. Plus, transcripts are great for SEO and accessibility.

Step 5: Setting Up Your Course for Success
You’ve created the content. Now let’s talk about presentation and structure within your chosen platform.
Structure for Completion
Here’s a stat that’ll keep you up at night: the average online course completion rate hovers around 15%. Brutal, right? But you can beat those odds with smart course design.
Start with a quick win. Your first lesson should deliver immediate value or a small achievement. This hooks students and builds momentum.
Create a logical progression. Each lesson should build on the previous one. Don’t jump around or assume knowledge students haven’t learned yet in your course.
Add checkpoints. Quizzes, reflection questions, or small assignments between sections help cement learning and give students pause points to absorb information.
Build a community. If your platform supports it (Circle and Mighty Networks are great for this), create a space where students can interact, ask questions, and support each other. Community engagement skyrockets completion rates.
Polish Your Course Presentation
Record a compelling introduction video. This is your chance to connect personally with students. Explain what they’ll learn, why you’re qualified to teach it, and what they can expect. Show some enthusiasm—if you’re not excited about your course, why should they be?
Write clear lesson descriptions. Each lesson should have a short description of what’s covered and what students will be able to do afterward.
Create a professional course image. This shows up everywhere—on your sales page, in marketplace listings, in students’ dashboards. Invest in a clean, professional design using Canva if you’re not a designer.
Step 6: Pricing Your Online Course Strategically
Ah, pricing. The eternal question that makes everyone squirm. Should you charge $27 or $2,700? Here’s how to figure it out without losing your mind.
Factors That Determine Course Pricing
Transformation level: A course that teaches someone to make pasta at home? Maybe $49. A course that teaches someone to launch a six-figure freelance business? Could be $997 or more. Price based on the outcome value, not just the content volume.
Your audience’s budget: Be realistic about what your target market can afford. Students versus working professionals have very different price sensitivities.
Course length and depth: A 2-hour mini-course won’t command the same price as a 20-hour comprehensive program. But don’t fall into the trap of thinking longer is always better—focus on value density.
Competition pricing: Check what similar courses charge. You don’t need to match them exactly, but you should be in the ballpark unless you have a compelling reason to differ.
Common Pricing Strategies
Low-ticket ($25-$100): Great for building an audience, testing topics, or impulse purchases. Easier to sell but requires higher volume. Works well on marketplaces like Udemy.
Mid-ticket ($200-$500): The sweet spot for many creators. High enough to attract committed students, low enough not to require extensive sales processes.
High-ticket ($1,000+): Requires more comprehensive content, often includes coaching, community, or implementation support. Harder to sell but far more profitable per student.
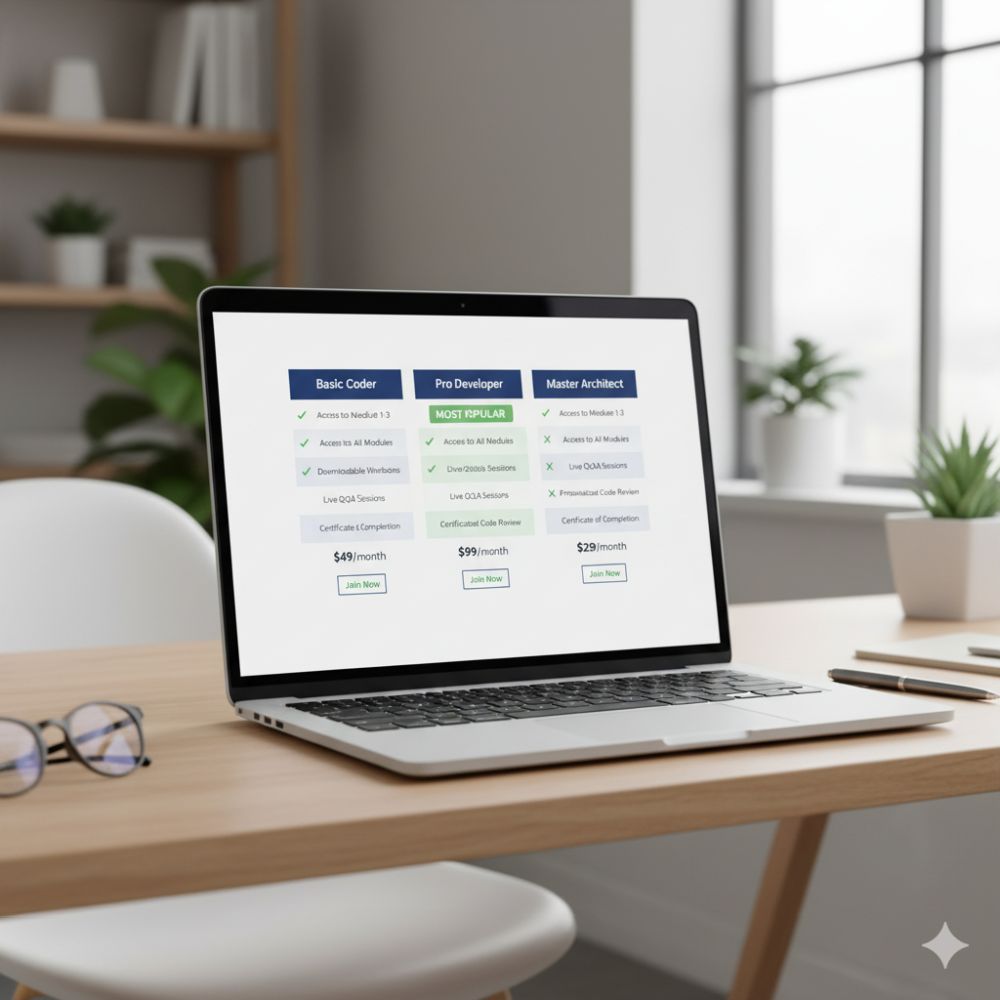
Tiered pricing: Offer multiple levels—a basic version, a premium version with extras, and maybe a VIP version with coaching calls. This lets students choose their investment level.
My advice? Start mid-ticket unless you have a strong reason not to. You can always adjust based on conversion data and feedback.
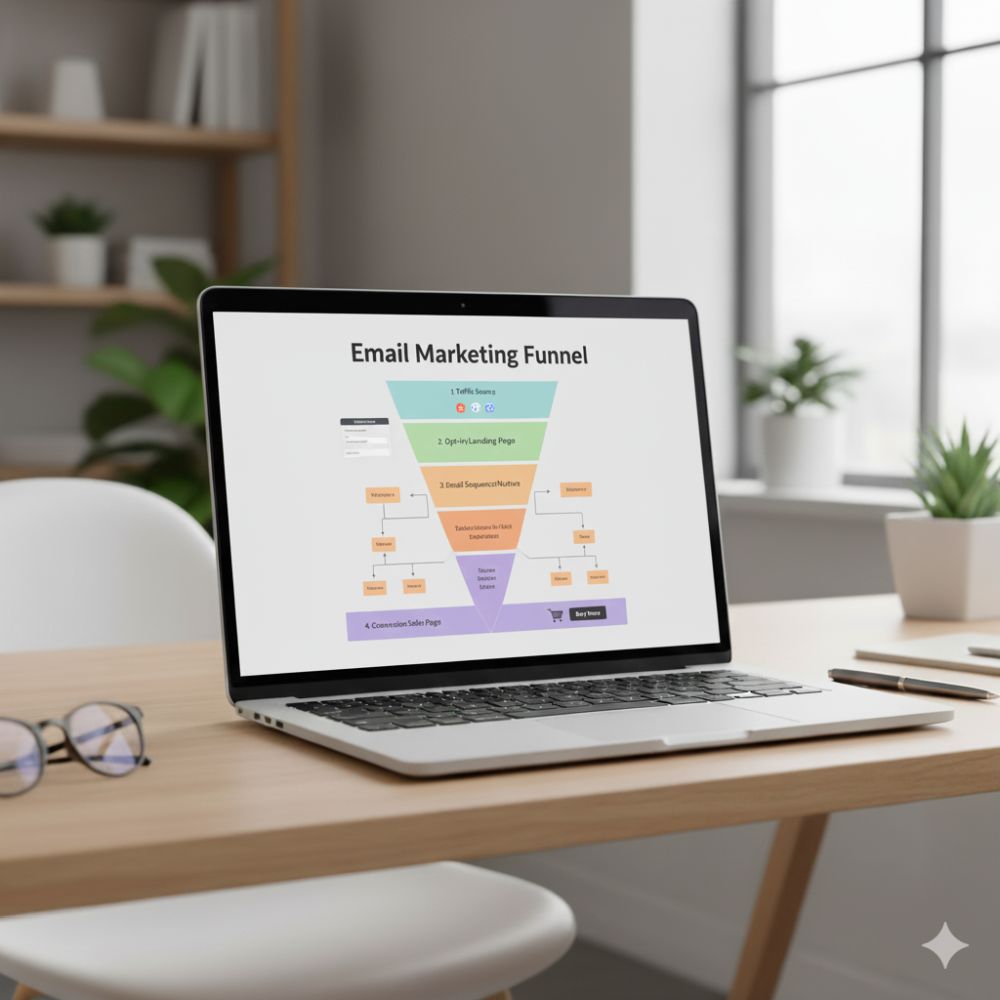
Step 7: Building Your Course Sales Funnel
Creating a great course is only half the battle. Now you need to actually sell it. This is where your course sales funnel comes in—the journey that takes someone from “who are you?” to “here’s my credit card.”
The Essential Funnel Components
Landing page: This is your sales page—where you convince people your course is worth buying. It should include:
- A compelling headline addressing their main pain point
- Clear explanation of what they’ll learn and achieve
- Your credibility and why they should trust you
- Student testimonials (once you have them)
- Detailed curriculum breakdown
- Clear pricing and call-to-action
- FAQ section addressing common objections
Lead magnet: Offer something valuable for free in exchange for an email address. A mini-course, checklist, or guide related to your main course topic works great. This builds your email list—your most valuable asset.
Email sequence: Once someone joins your list, nurture them with valuable content that positions you as an expert and gradually introduces your course as the solution to their problem.
Sales emails: When you’re actively promoting (during launches or evergreen campaigns), send targeted emails that create urgency, overcome objections, and drive people to your sales page.
Build That Email List
I cannot stress this enough: you need an email list to successfully sell online courses. Social media followers are great, but you don’t own that audience. The platform does. Email subscribers? Those are yours.
Pro Tools: Kit.com is a solid email platform (formerly known as ConvertKit) is simple and solid solution to grow your audience. I also use Convertbox for email lead capture on my blog.
Start building your list immediately:
- Create a valuable lead magnet related to your course topic
- Use ConvertKit, Mailchimp, or ActiveCampaign to manage subscribers
- Add sign-up forms to your website, blog, and social profiles
- Consistently provide value to keep subscribers engaged
Even if you’re launching on a marketplace like Udemy, having your own list means you can promote future courses without relying solely on the platform’s algorithm.
Step 8: Marketing and Promoting Your Online Course
You’ve built it. Now they need to come. Course marketing is where creativity meets strategy, and it’s absolutely essential for sales.
Organic Marketing Strategies
Content marketing: This is my favorite long-term strategy. Create blog posts, YouTube videos, or podcast episodes that provide genuine value around your course topic. Include calls-to-action directing people to your lead magnet or course. This builds authority and drives evergreen traffic.
Social media presence: Choose 1-2 platforms where your audience hangs out and show up consistently. Share tips, behind-the-scenes content, student wins, and course updates. Instagram and LinkedIn work great for most niches, but don’t sleep on TikTok if your audience skews younger.
SEO optimization: If you have a blog or website, optimize it for keywords related to your course topic. Getting ranked for terms like “how to create online courses” or “best email marketing strategies” brings free, targeted traffic indefinitely.
Guest appearances: Get on podcasts, write guest blog posts, or collaborate with other creators in your niche. This exposes you to established audiences who already trust the host.
Free workshops or webinars: Host a live training that delivers massive value and ends with an offer to join your course for deeper learning. Webinars convert incredibly well for course sales.
Paid Advertising Options
Once you’ve proven your course sells organically, paid ads can scale things up quickly:
Facebook and Instagram ads: Great for targeting specific demographics and interests. Start with a small budget ($10-20/day) and test different ad creative and copy.
Google Ads: Perfect if people are already searching for your solution. Target keywords related to your course topic.
YouTube ads: Especially effective for courses related to business, tech, or creative skills.
Influencer partnerships: Pay creators in your niche to promote your course to their audience. Often more effective than traditional ads because of the trust factor.
The Power of Pre-Selling
Should you pre-sell your course before it’s complete? Absolutely, and here’s why:
- Validates demand before you invest months creating content nobody wants.
- Generates cash flow to invest in better equipment or marketing.
- Creates accountability to actually finish the course (hello, paying customers waiting).
- Builds launch momentum with founding students who become your first testimonials and advocates.
To pre-sell effectively:
- Create a detailed outline showing exactly what the course will cover
- Set a clear completion timeline (be realistic—underpromise, overdeliver)
- Offer a founding member discount (30-50% off the final price)
- Deliver content in phases as you create it
- Gather feedback from founding students to improve the course
Step 9: Keeping Students Engaged and Ensuring Completion
Remember that depressing 15% completion rate I mentioned? Let’s make sure your course beats it.
Engagement Tactics That Work
Onboarding that sets expectations: From day one, tell students what to expect, how much time they should dedicate, and what success looks like. Reduce overwhelm by breaking the course into manageable chunks.
Regular check-ins: Send encouragement emails at key milestones. “Congrats on finishing Module 3!” goes a long way in motivating continued progress.
Community interaction: Active community forums, Facebook groups, or Circle communities create accountability and support. When students see others succeeding, they’re motivated to keep going.
Live Q&A sessions: Monthly or quarterly live sessions where you answer questions, create connection and renewed interest in course completion.
Gamification elements: Badges, certificates, progress bars, and achievement unlocks tap into our natural desire for completion and recognition.
Assignments and feedback: When students create something and get personalized feedback, they’re far more invested in finishing.
Collecting and Using Feedback
Don’t wait until the end to ask for feedback. Throughout the course, ask students:
- What’s working well?
- What’s confusing?
- What additional resources would help?
- What results are they seeing?
This feedback helps you improve the course continuously and gives you powerful testimonials for future marketing.
[Insert image of student dashboard showing progress tracking and community features]
Step 10: Common Mistakes to Avoid
Let me save you some headaches by highlighting the mistakes I see repeatedly:
Perfectionism paralysis: Your first course won’t be perfect. Launch it, get feedback, improve it. Done is better than perfect.
Information overload: More content doesn’t equal more value. Focus on delivering transformation, not exhaustive information. Cut the fluff.
Ignoring course marketing: “If you build it, they will come” is a movie quote, not a business strategy. You need to actively promote your course.
Underpricing out of fear: Don’t charge $27 for something worth $297 just because you’re scared. Price based on value, not insecurity.
No clear transformation: If students can’t articulate what they’ll achieve by taking your course, you haven’t communicated it clearly enough.
Forgetting about existing students: Constantly chasing new students while ignoring those who already bought from you is backwards. Nurture your existing community—they’re your best source of testimonials, referrals, and upsells.
Platform hopping: Constantly switching platforms wastes time and confuses students. Pick one, learn it well, and commit for at least 6-12 months.
Scaling Beyond Your First Course
Once you’ve successfully launched and sold your first course, the real fun begins. Here’s how to scale:
Create upsells: Offer advanced courses, coaching, or implementation programs to students who complete your foundational course.
Build a course library: Multiple courses at different levels create more revenue streams and keep students in your ecosystem longer.
License your course: Sell the rights for other organizations or educators to use your course with their audiences.
Create a certification program: If your topic allows, offer certification for completing your program. This adds credibility and commands higher prices.
Develop a membership site: Bundle multiple courses with ongoing content and community for recurring monthly revenue.
Your Next Steps
Here’s what I want you to do right now—not tomorrow, not next week, but today:
Choose your course topic. Write down three ideas based on your expertise and what people ask you about.
Validate your idea. Survey your audience, research competitors, or create a simple landing page to gauge interest.
Select your platform. Based on your budget and needs, sign up for one platform and commit to learning it.
Outline your course. Even if it’s rough, getting your ideas organized on paper makes everything else easier.
Create your lead magnet. Start building that email list immediately, even before your course is ready.
The online course world isn’t going anywhere. It’s growing, evolving, and creating opportunities for creators who are willing to do the work. You don’t need to be the world’s leading expert—you just need to know more than the person you’re teaching and have the ability to explain it clearly.
The hardest part? Starting. Everything else is just process, iteration, and improvement.
So what are you waiting for? Your course idea won’t create itself, and there are people out there right now searching for exactly what you know. Go help them.